Add a Domain to PlaceOS
Add a Domain to PlaceOS
Section titled “Add a Domain to PlaceOS”Overview
Section titled “Overview”This guide will step through the process of creating a domain and the associated application(s) that will exist on it.
You must create a domain before adding authentication sources (such as SAML) to it.
Prerequisites
Section titled “Prerequisites”- PlaceOS has been deployed
- You know the domain(s) required for the deployment and the applications on them
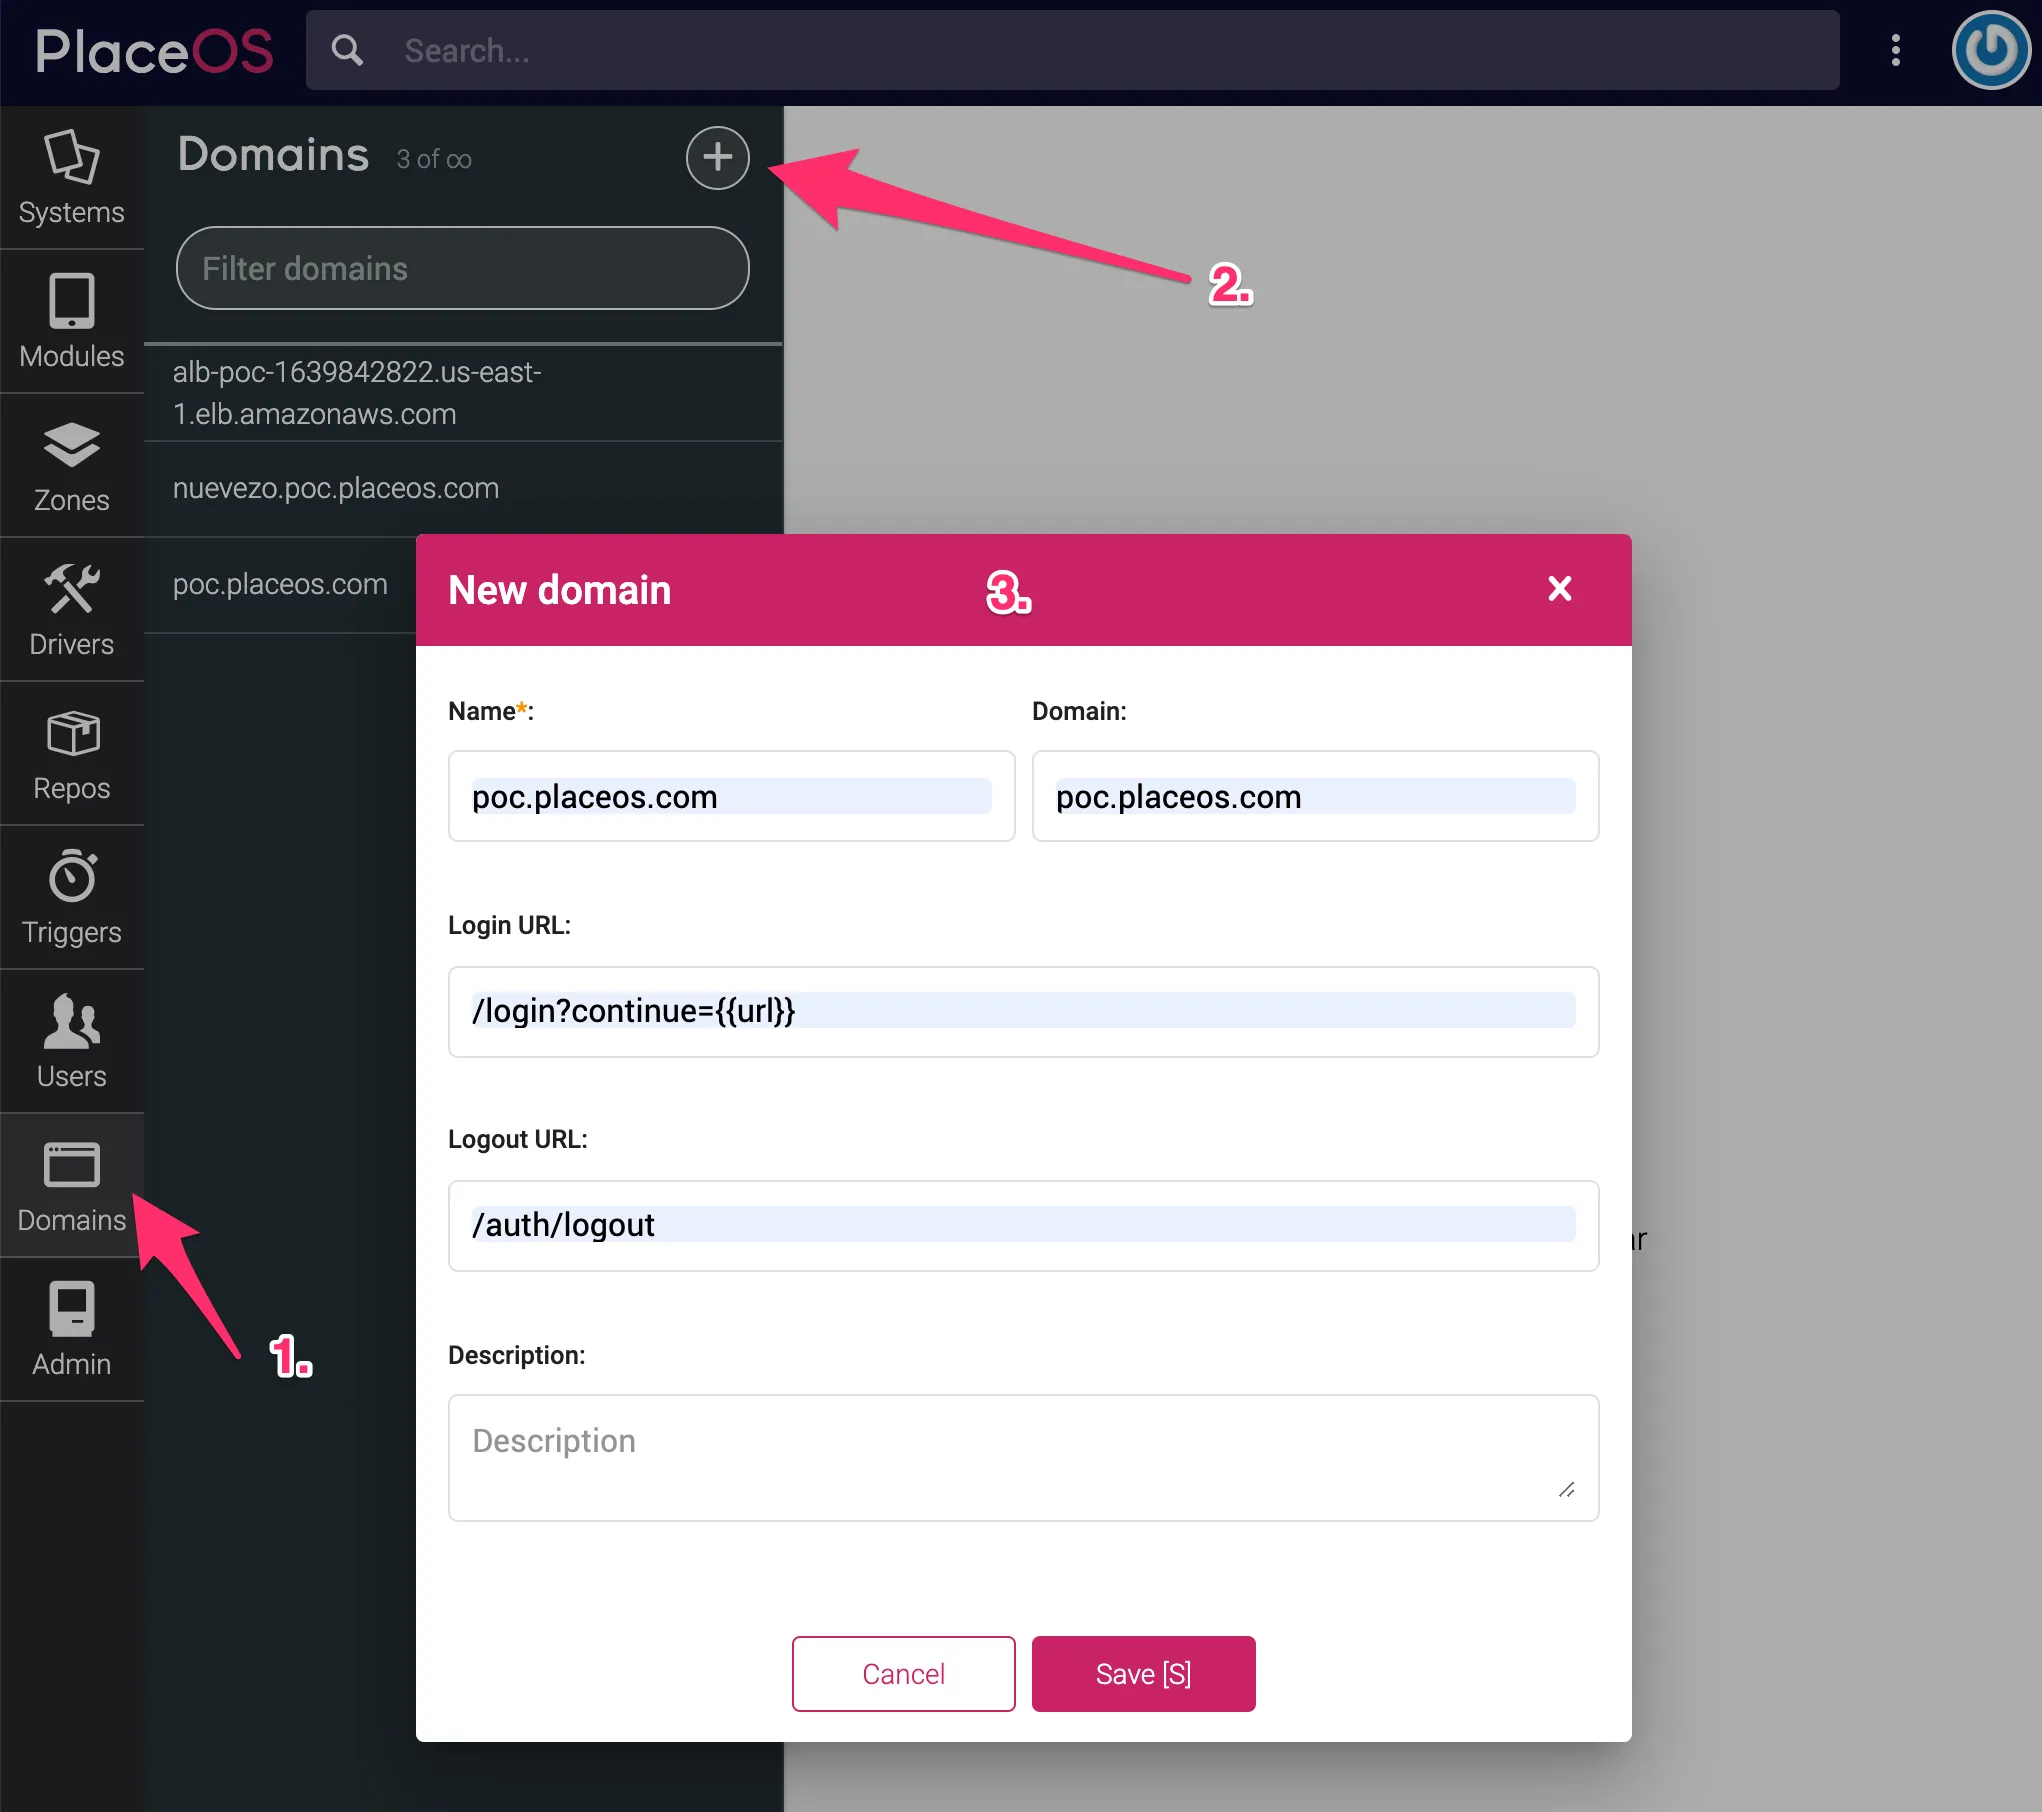
Step 1: Create the New Domain
Section titled “Step 1: Create the New Domain”- Log in to Backoffice on the domain created during deployment and select the Domains tab
- Select the
+button to bring up the New Domain form - Add the following fields:
Name: Can be anything to identify the domain, like the domain itself i.e.placeos.domain.comDomain: The actual domain, without a protocol i.e.placeos.domain.comLogin URL: The URL redirected to when a user logs in- You should usually set this to
/login?continue={{url}}
- You should usually set this to
Logout URL: The URL redirected to when a user logs out- You should usually set this to
/auth/logout
- You should usually set this to
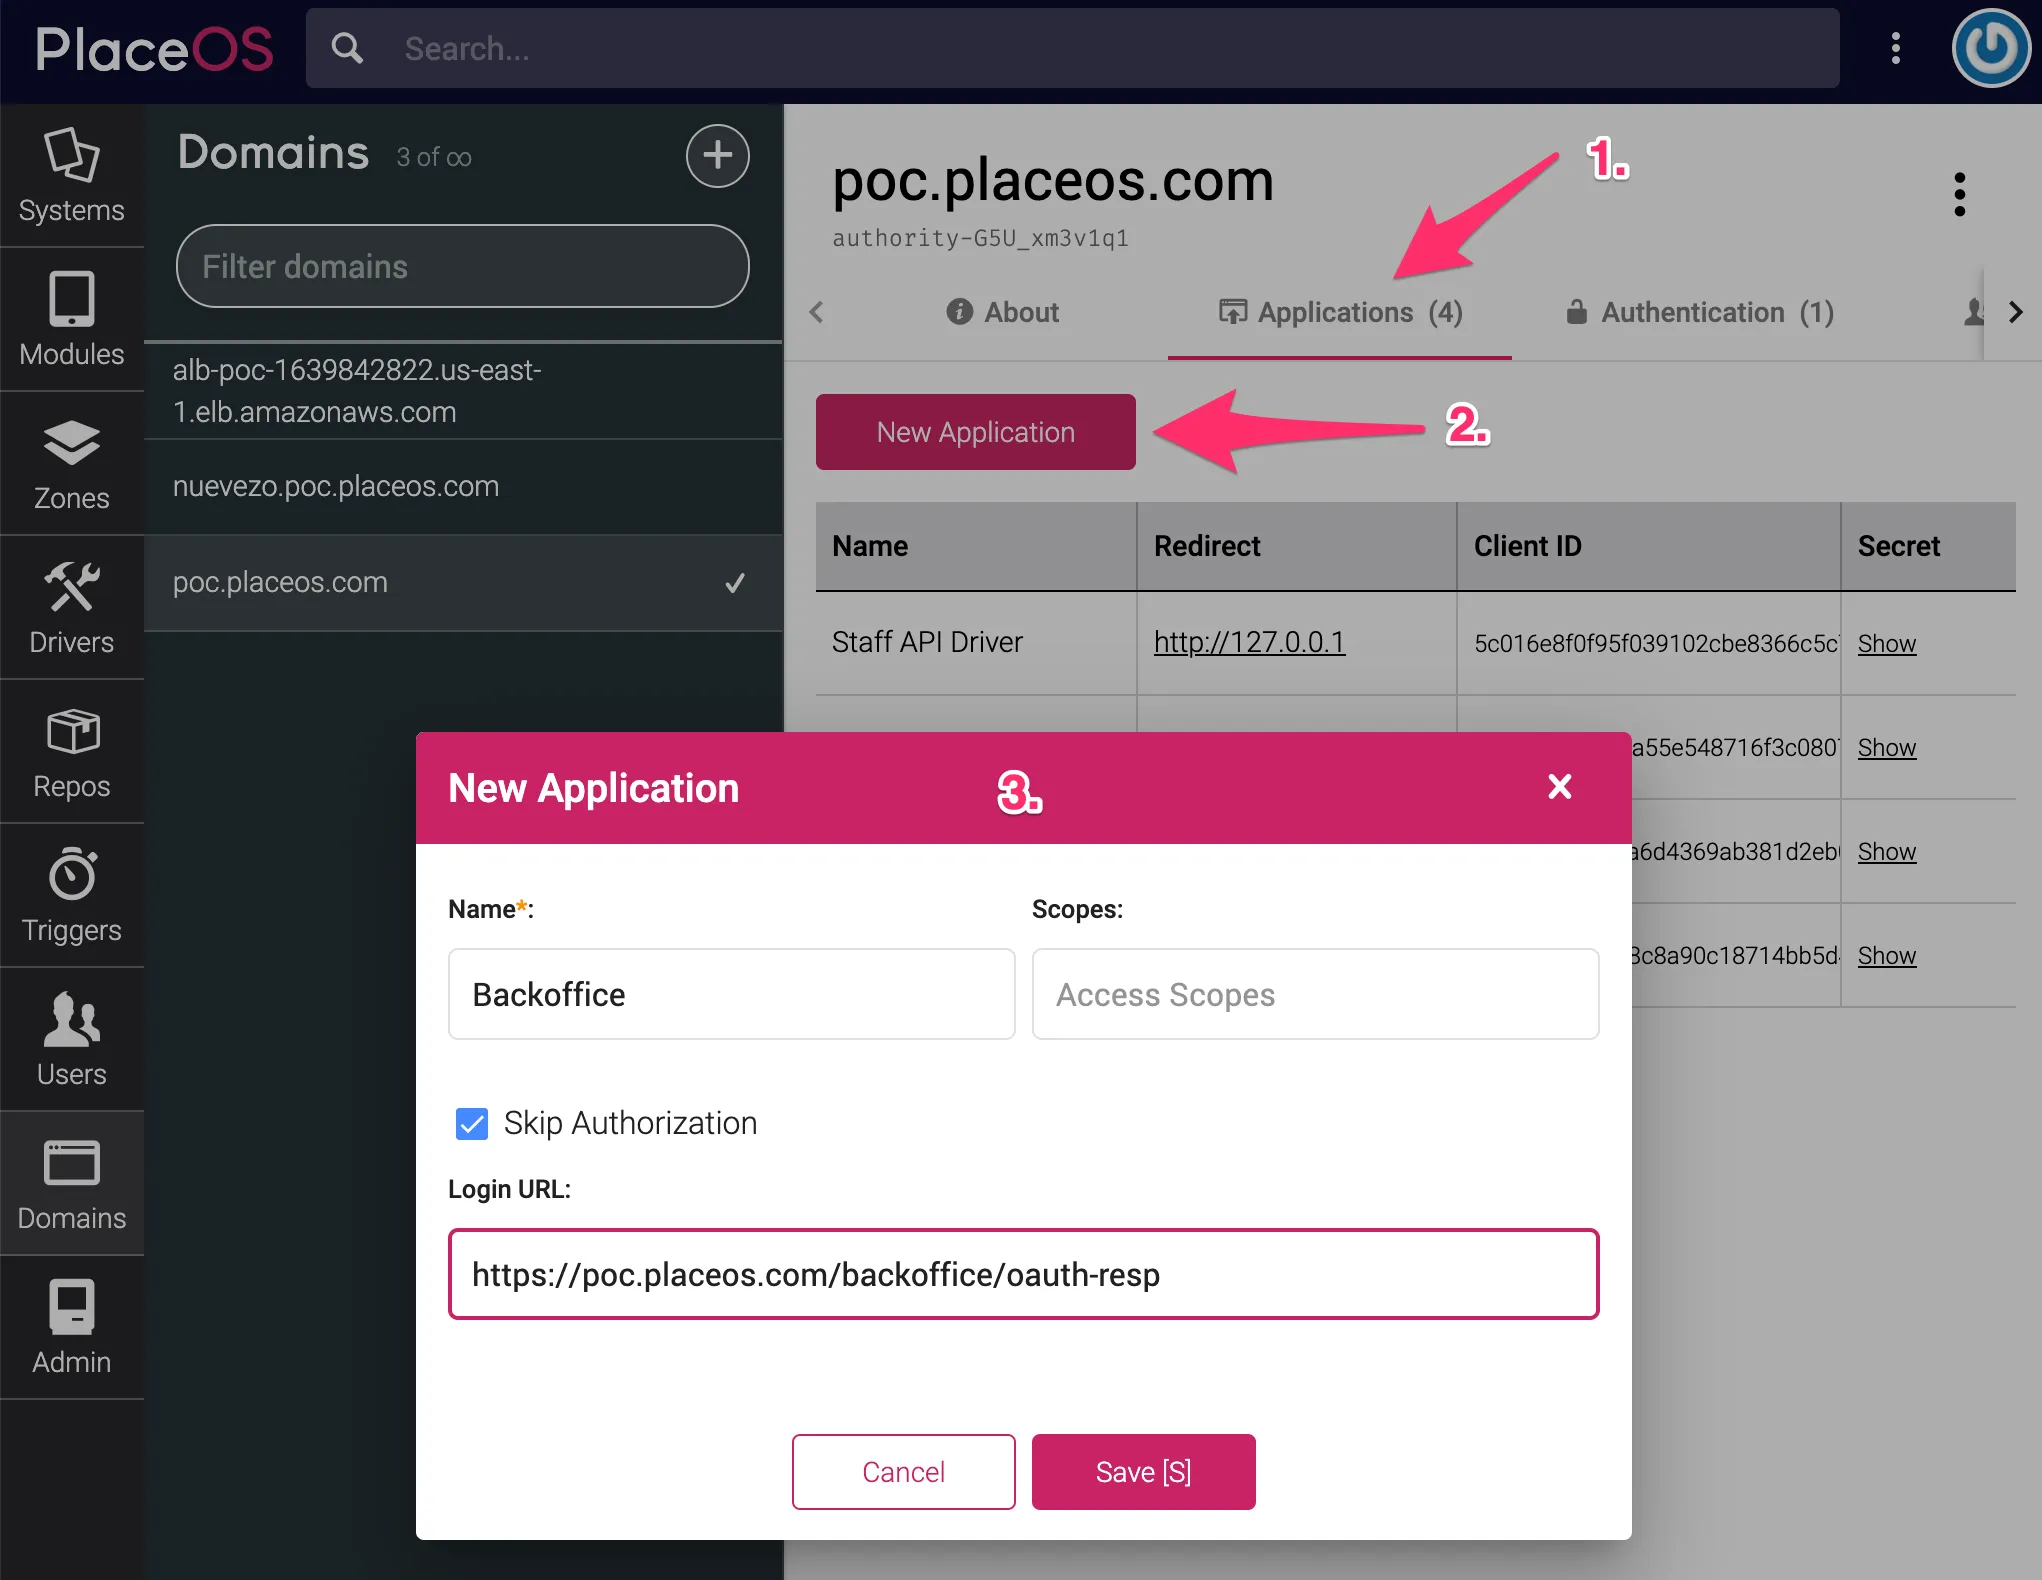
Step 2: Add an Application to the Domain
Section titled “Step 2: Add an Application to the Domain”- Select the Applications tab
- Choose New Application
- Add the following fields:
Name: Can be anything to identify the applications- Usually the folder path where the application resides but capitalized i.e.
Backoffice
- Usually the folder path where the application resides but capitalized i.e.
Scopes: Leave this blankSkip Authorizaiton: Check the box to set this totrueLogin URL: The location that users are redirected to after completing authentication- This will generally be something like
https://<domain>/<application path>/oauth-resp.html
- This will generally be something like
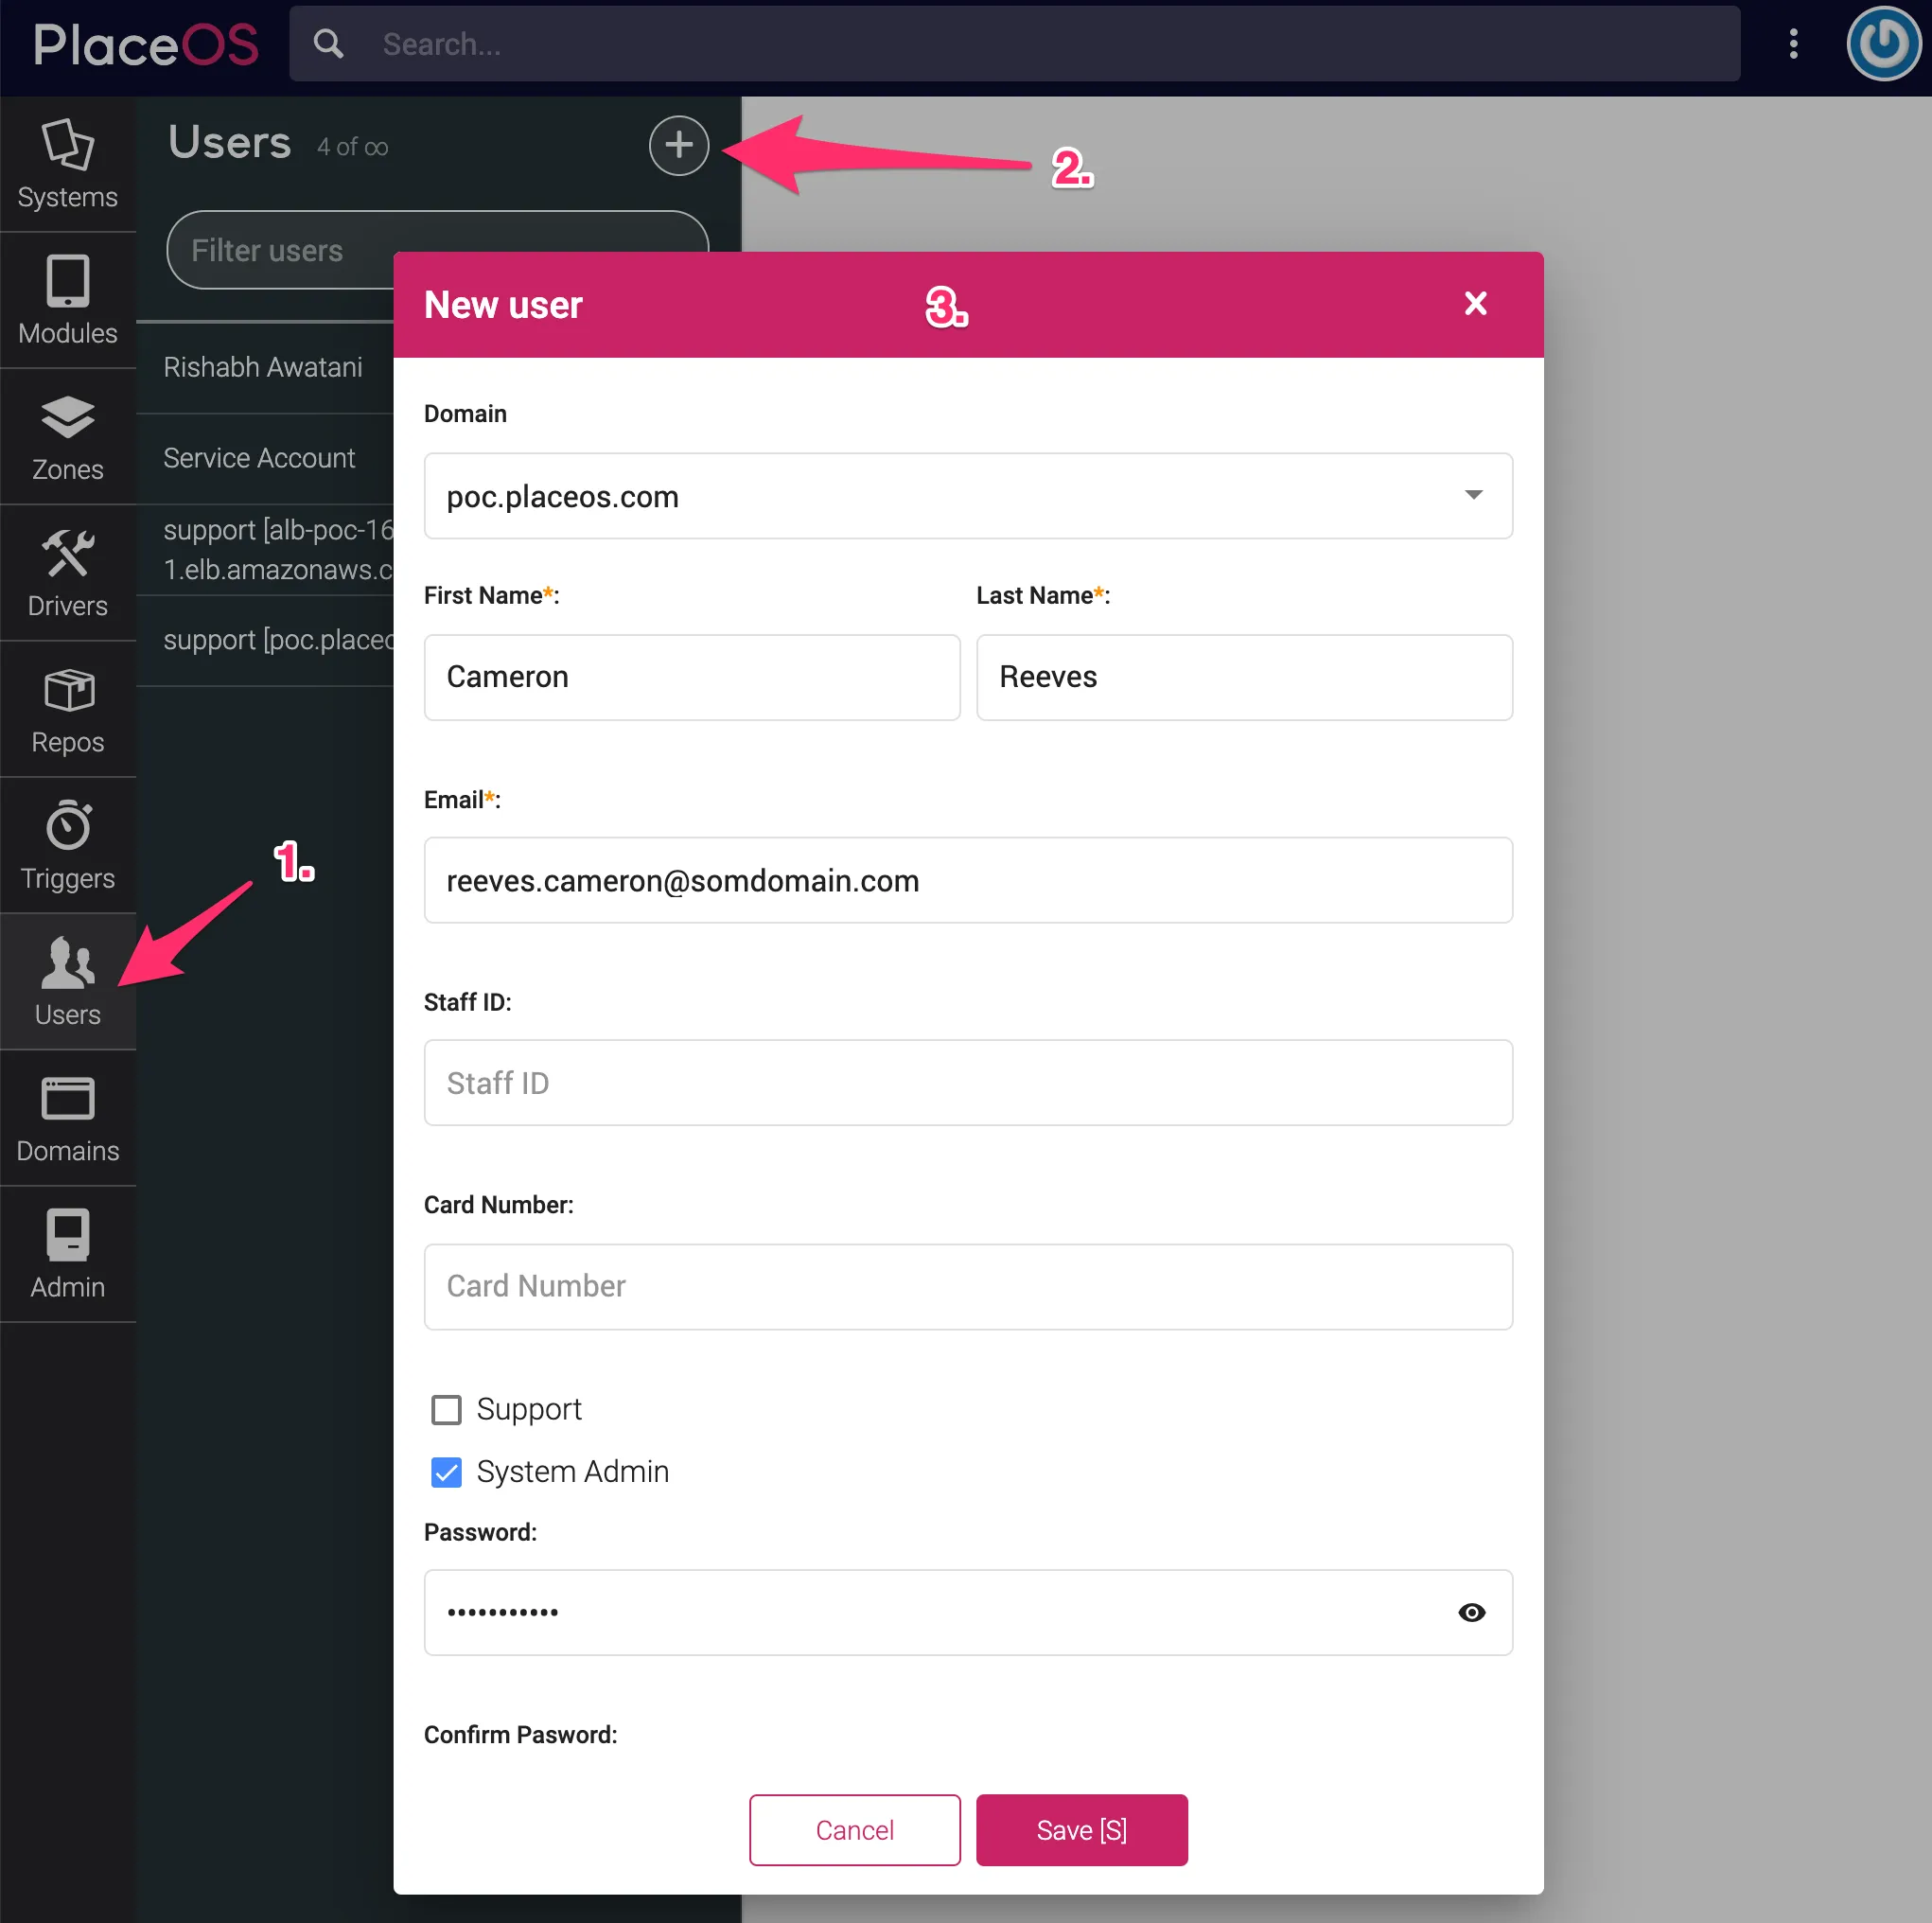
Step 3: Add a User to the Domain
Section titled “Step 3: Add a User to the Domain”- Select the Users tab
- Select the New User button
- Add or select the following fields:
Domain: Select the domain you created in Step 1First Name: Add the first name of the user, this is requiredLast Name: Add the last name of the user, this is requiredEmail: This will be the username and is requiredSystem Admin: Denotes whether the user will be an admin (and thus can access and make changes in Backoffice)- This will usually be set to true when creating users in this interface
PasswordandConfirm Password: Enter the password which the user will use to login (when not using SSO)
You can now login with this new user on the domain created.